Your Custom Text Here
Pelvic Floor Rehab-Abductors & Adductors

As we travel up from the feet and ankles towards the pelvic floor, we hit the adductors and abductors (inner & outer thighs). These are the balance muscles of your legs, the I’m-falling-and-I-can’t-get-up muscles. The inner thighs run contiguous to the pelvic floor and core muscles. AND pretty much everyone is weak in these groups.
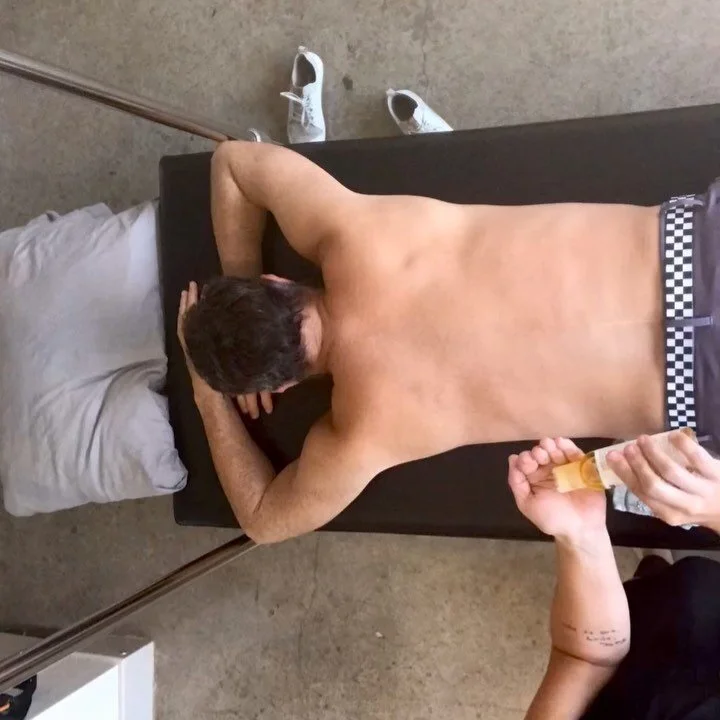
Massage
Par for the course of this Pelvic Floor Rehab series, we release, then re-engage. You have a few options for that here. The most cost effective is to purchase a foam roller. I always advocate buying a 36” roller as they are more versatile for things like core work in addition to release work. You have the standard density option (which can be pretty intense for certain areas of the body) or a less dense, softer version. Amazon has everyone beat that I ever see in terms of price, a link to purchase here. And here’s a link to a previous video on how to use a foam roller on the inner thighs as well as a trigger point release for the pubic bone.
You can also use a theragun or other self-massager. Two of my favorite options are here for a more affordable version and here for a more versatile version, particularly for when we get into the pelvic floor releases in a couple episodes. There are attachments to the latter massager that make it easier to access smaller muscles and yield a more pinpointed release.
Lastly, I love cupping the outer thighs/IT band. It’s an easy thing to do as you watch TV and is not rocket science. Here’s a link to the cupping set I’ve used for years. Alternatively, you can foam roll your IT band, link on tips for that here.
So, massage/roll/cup the inner and outer thighs. We also do some work on the Quadratus Lumborum (QL) in this video. This muscle causes a lot of issues for a lot of people and is often tightened up on just one side, lending someone to be crooked. I find that it becomes that way, in part, because of weakness in the muscles targeted in this video.
Stretch
You can easily stretch your IT band/abductors by putting a towel around your foot and pulling your leg across your body. Alternatively, you can put one foot on a surface like a chair or couch and then twist your body over that extended leg. Try to drop the targeted butt cheek towards the floor as you stretch.
For the inner thighs/groin, here is a shortened version of my favorite stretch that is also in this video.
To stretch the QL, stand inside of a doorway, bring your inside leg forward and grab onto the doorframe—you’re bending over the direction of whichever leg is forward. So, right foot in front, you’re bending to the right to grab onto the doorframe. You can gradually add a twist of your chest towards the doorframe and you may feel this stretch go all the way down your back.
Activate
My preferred way to activate the abductors is a simple side leg lift, a la Jane Fonda. I find that this isolates them better than doing a side squat walk with a band around the thighs. In a squat walk, I feel like people load more into the quads. Here’s a link to a shorter version of what I’m talking about.
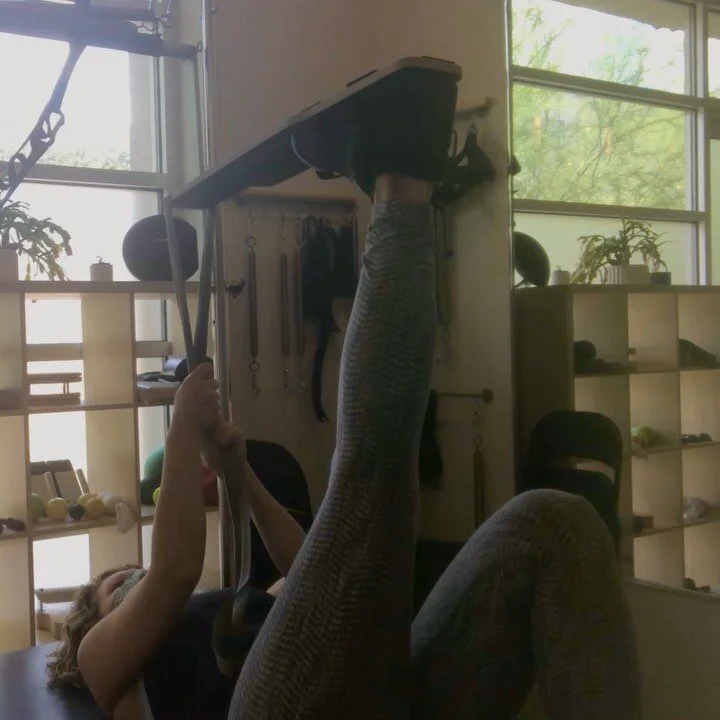
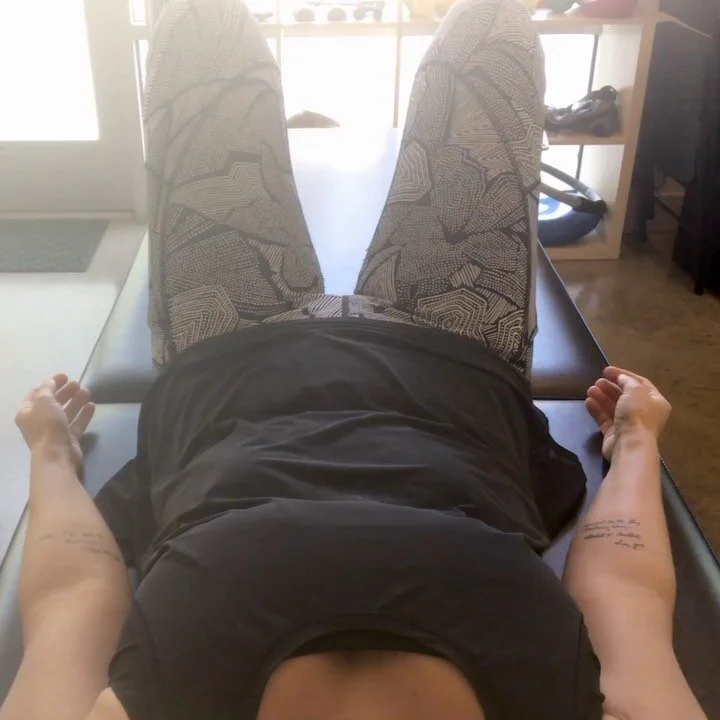
For the inner thighs, you can adduct the legs (bring them together) with them up on a wall or in the air. Here’s a version in the air, which works the core more. If your hamstrings are super tight, the wall might be better. You can also start with a more gentle version like this with the knees bent.
The QL is the ‘hip hiker’ muscle. If you stand on an elevated surface like a curb or even a yoga block, you would pull the hip up directly to your ear on that respective side. You’ll know which side is your weaker if that motion feels completely foreign to your brain.
Having good stability in these muscles is a critical piece to balance and therefore aging well. This means aging well for all genders. Some of my male clients talk about these machines in the gym and refer to them as the ‘chick machines’. Balance is for everyone, so don’t forget to target these just as much as squats and lunges in your workouts—stability in these muscles will make things like lunges easier. And, these are the struts to the pelvic bowl, so inner outer thigh strength is pelvic floor strength. Channel your inner Jane Fonda, y’all.

Common Cause of Knee & Ankle Pain
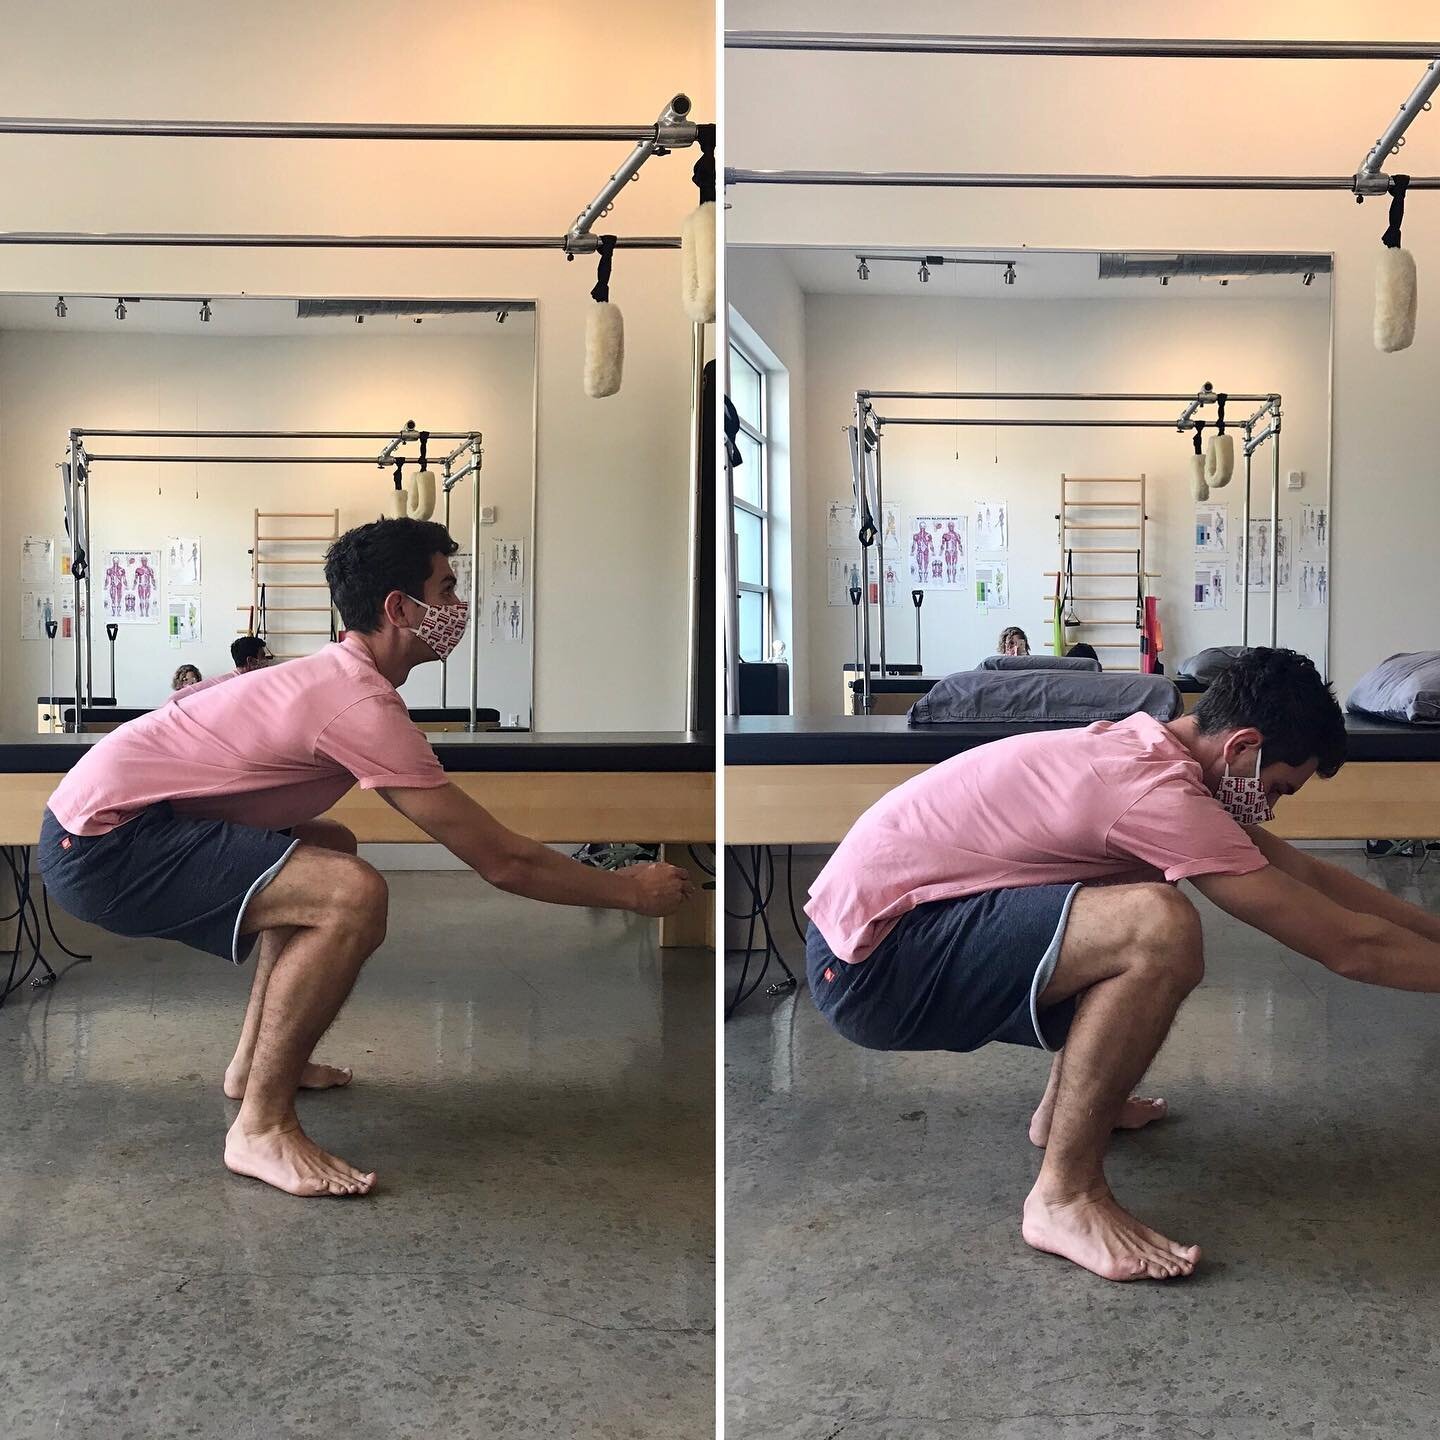
TIGHT TOES! Take a little walk—long enough to get your stride and pace going and notice if you feel your ankle roll out to the side just a little bit as you push off. You may even feel a twinge of pain in your ankle or knee. Another option is to get someone to video you (maybe even in slow motion) and see if you can watch yourself doing it. It will look like a little ankle whip around as you propel forward as in the picture below.

How would the toes get tight?
The top two reasons from my experience with clients are shoe selection and not breathing fully. Any shoe that encourages a toe scrunch would create a situation where your body would start tighten when walking instead of being wide and open (I refer to this preferred state as ‘Frodo Feet’). This isn’t just the easy scapegoat of high heels and pointy shoes, flip flops or any shoe that is so loose that your toes have to work to keep them on would create tight toes. Wearing shoes that are too small or lacing shoes too tightly would cause similar footing.
Next, hold your breath and feel how your feet tighten up a bit (all your muscles, really). We all have a tendency to shallow breathe when we feel stressed, so being under prolonged stress or if you’re in a job/school environment where you heavily focus day-to-day, usually means that you’re holding your breath. I often see that if someone grew up in an environment where they were often afraid or anxious (this could also translate into present-tense adulthood) the toes also scrunch as a response to that fear factor. I call it the Bird-on-a-Wire grip whereas that Frodo Foot is grounded and open…calm.
How should I walk?
This goes with a bit of an * in that we’re all shaped differently and have varied movement/injury backgrounds so there isn’t one for sure right way. That said, the first two toes (big toe and second toe) should more or less line up with your shin bone and thigh bone. This may be difficult if you have flat arches or have had other lower leg injuries. These bones are considered your weight-bearing bones so your body weight is centered over the mid-line of your body. Your weight centered here would naturally allow your core and posture muscles to support you as you walk or run. Lack of weight-centering can cause weight to shift to the outer or lateral lines of the body in walking, which could be a factor in a tight IT band, lower back pain, knee pain and ankle issues.
As you take a step forward, the foot should roll through the mid arch to push off with the ball of foot and then the toes. If you have a tight first or second toe and/or a bunion, you are likely not pushing off of that foot correctly and you may be rolling to the outside of the foot as shown in the picture above.
An exercise to stretch your toes and allow for proper toe push off.
This simple stretch can be done with a rolled up towel or a tennis/lacrosse ball against a wall. In the video, my model is demonstrating it with one of my favorite foot stretching and release tools, the Yamuna Foot Savers. Here’s another way they can be used to release foot tension and help with plantar fasciitis. You can easily purchase them online through Amazon and they last forever. Take them with you when you travel because they take up virtually space and really help loosen the feet after sitting in a car or being in a plane for long periods of time. If you do have a bunion and this stretch feels uncomfortable, you can stretch your big toe off to the side and focus on your second toe. No need to do more than about 10ish repetitions on any given toe and only about once per day at most.
Happy, grounded feet=better balance and core stability!
Cross Training for Runners
We are deep in marathon-training season here in Texas thanks to temperatures that make outdoor activity easier. It's also a season when logging high mileage can lead to poor movement patterns and then injury. Using a combination of massage, trigger point therapy, stretching and strength training can not only keep you inury-free, it can also improve time and performance on the road.
This is a collection of some of my favorite stretches and exercises for runners, particularly for folks who stare at a screen for a living and love running for cardiovascular and mental health. As someone who is a bit 'Type A' I love my exercise and stretching routines to have twofers or threefers meaning you're getting multiple benefits from each. We're all busy so we might as well feel like we're accomplishing a few things at once from our stretching routines.
Massage & Trigger Point Release
We could all use to take better care of our feet, especially if you're out pounding the pavement for miles every week. Consider this massage like foam rolling for your feet. It only takes a couple of minutes and is easy to do while watching tv or before you pop on those shoes for a jog. Check and see if your foot changes color after you do it!
Trigger Point
The gist of trigger point work, if you have not heard of it before, is that you find a tender spot and apply consistent pressure until the muscle starts to relax. This can take minutes and can be confusing at first if you can't feel the muscles releasing. The more you practice the easier it is to know when the muscle is letting go. You can use a ball, foam roller or other trigger point therapy tool--my only reminder is to breathe! Below are two different releases you can do with a ball and a foam roller.
Piriformis (hip rotation) Trigger Point Release
Gluteal (butt) Muscle Trigger Point
Calf Trigger Point Release
Stretching
If you want to up your stretching routine and do something beyond the basic quad and calf stretch you learned in grade school, these are my favorites for stretching multiple places at one time. They incorporate stretching muscles as well as facial or connective tissue lines. Many runners may be aware that their calves and hamstrings could use a stretch (find my favorite version here), but knowing how to stretch the front of the shins is a bit more complicated. Click here for my suggestion for a good shin stretch.
Strengthening Exercises
When you're spending so much time on the road just trying to get your mileage in, stretching may be the only thing you may take time to do. Cross training exercises are soooo important for runners as you're doing a highly repetitive action. This plus long hours potentially looking at a screen usually means the hip muscles become weak because they're being supported by a chair most of the day. Hip weakness combined with high mileage is a recipe for chronic pain or an injury. Most runners I've worked with need more lateral (abductor) strength, inner thigh (adductor) strength as well as core stability via the obliques.
Strengthen You Rear
Inner Thigh Stretch and Strengthening
When looking at a screen most hours of the day and then participating in exercise that is also very forward-oriented, the obliques and the cross body stability muscles become weak. Improving these means improving balance so your energy can carry you forward. An added bonus is that you may even see your waistline shrink if you work on these muscles. Here's a simple, yet super challenging one using a foam roller.
Core Strengthening and Stability
How I can help
Ki Hara active stretching (see example here) is super effective in creating flexibility and strength at the same time. Having this muscular dexterity not only allows you to run longer, but also faster. Many professional athletes and sports teams across the country use this technique as their secret weapon.
I also use a piece of equipment called the CoreAlign that is phenomenal for gait training and orienting the body to the core in a running motion (see more about it here). I've helped many marathoners streamline their gait patterns so they can lower their per mile time. If you've ever, even as a teen, had an injury to the lower half of your body, you may have established some compensation patterns in your walk. Running with these compensation patterns can be an underlying component to chronic pain and injury. Peeling back those patterns will give you more agility and speed as you run. You have more power than you realize!!
Latest Instagram Posts